
To record a video walkthrough and get feedback, capture your screen and voice, with your camera if you like, then share a link where viewers can comment on specific moments. In SceneNote, choose New project → Record screen, make your recording and turn comments on before sharing. Recording is free with an account, and viewers can leave notes without signing up.
The short version
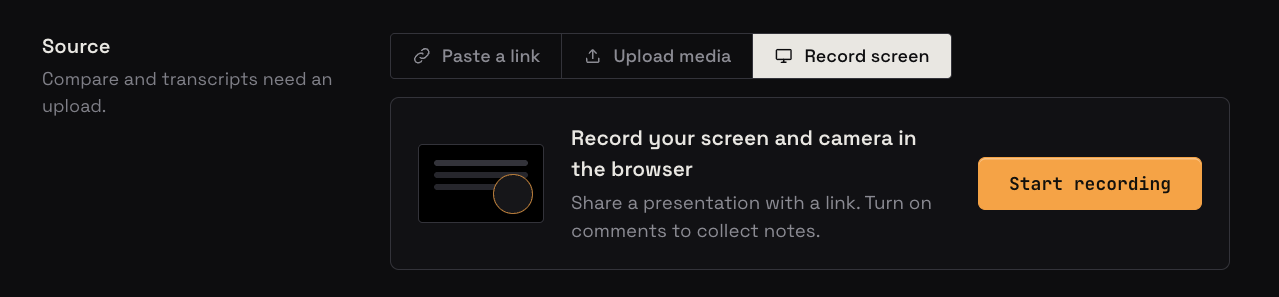
- Choose New project, then Record screen.
- Pick your camera, microphone and what to share.
- Record, and pause whenever you need to.
- Trim it, add chapters and write a short description.
- Turn comments on and send the link.
- Answer each note where it lands.
ON THIS PAGE · 8 SECTIONS
When is a screen recording the right tool?
A screen recording is the right tool when you need to show something on your screen and talk it through, and the other person can watch it in their own time. A simple test: if you'd book a call just to share your screen, record it instead.
In post-production, that usually means:
- Showing another editor how a project is set up: the files, the timeline and what's left to do, for example at a handover mid-project. How to walk another editor through your project
- Answering a note that needs more than a sentence: the shot they asked for that isn't working, or two music options played in context. How to reply to video feedback with a screen recording
- Pitching an idea or demoing a product: a treatment over a mood board, or a new structure for a documentary. How to pitch an idea with a screen recording
- Training an assistant or a new freelancer in how you work. How to record a tutorial or training video
- Giving a client a progress update mid-edit, without a meeting. How to send a video update instead of a meeting
Outside post-production, it's the same idea: a software demo, a lesson or how-to, a handover before you go on leave, an update for a team in another time zone, or feedback on a website or design that you talk through as you click.
When you're sharing a cut, a recording helps in a few specific cases, such as a long documentary's first assembly, where you want to talk the director through the structure and what's still missing before they watch. Most of the time, though, a short pre-watch note on the video is enough, and How to present a cut to a client professionally shows how.
How do you record a walkthrough, step by step?
You record a walkthrough in your browser, with nothing to install. You need a free SceneNote account, because a recording is saved as an uploaded project.
- Choose New project, then Record screen, and press Start recording. Any title you've already typed carries over.
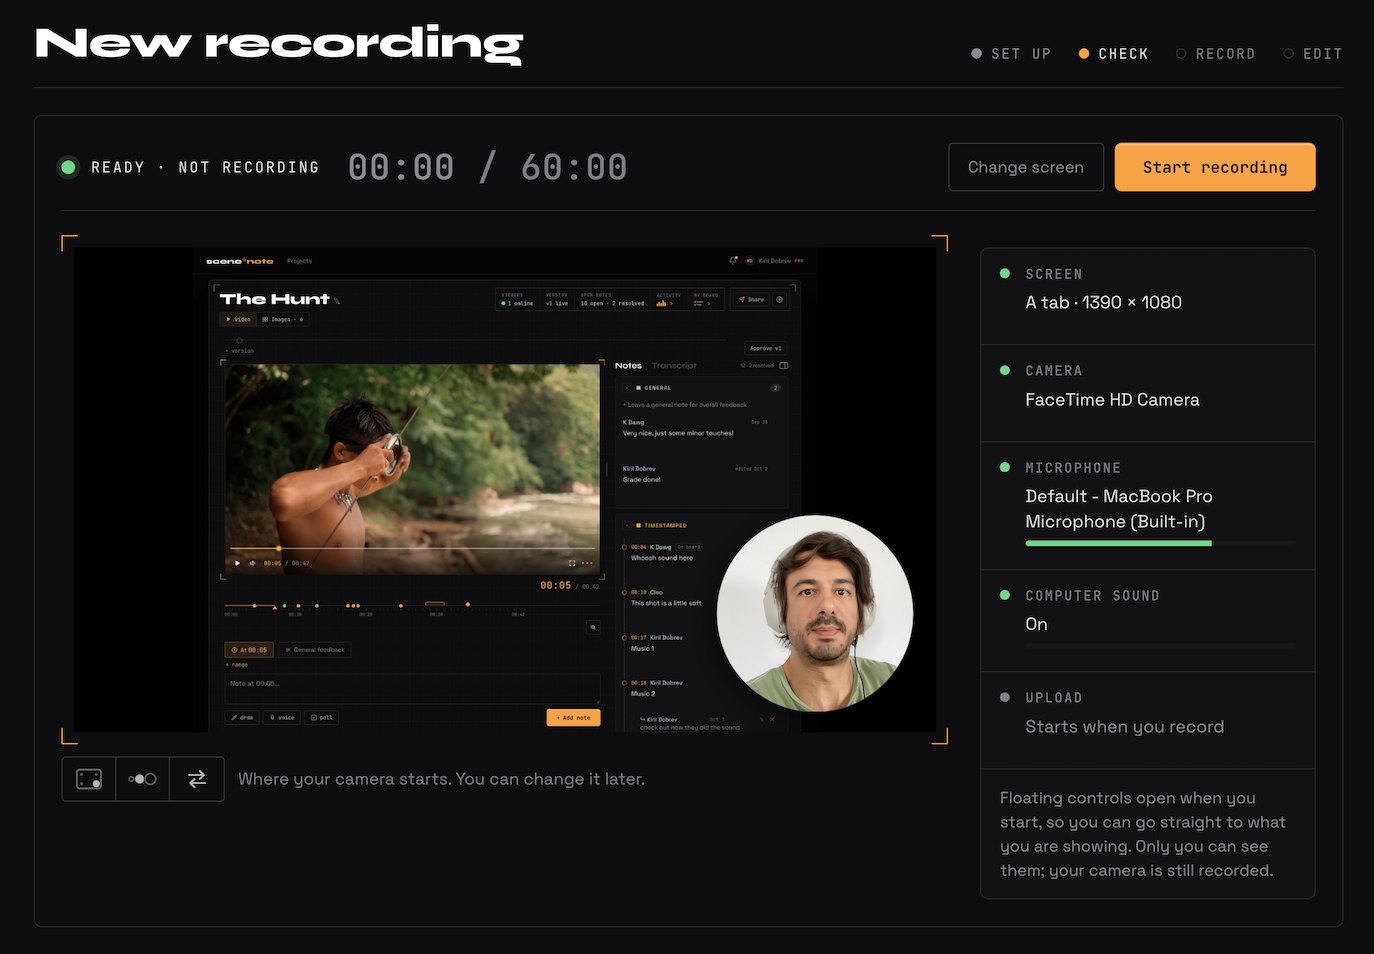
- Set up your camera and microphone. Pick them from the lists and check that the microphone level moves when you talk. Your camera shows as the circle it will be recorded as.
- Choose what to share: your whole screen, one window or one browser tab. To include computer sound in Chrome or Edge, turn on the audio switch in the browser's sharing window.
- Check the picture. You'll see your screen with your camera on it. Set the corner and size of the camera bubble, and make sure each check shows it's working.
- Press Start recording. Pause when you need a moment, Restart to begin again, and Stop when you're done. The clock shows how long you have left.
- Tidy it up and save (see the next section), then copy the link and send it.
The link works from the moment you start, so you can send it early. Anyone who opens it before you've finished sees that it's still being recorded.
If you share one window or tab in Chrome or Edge, small floating controls let you pause and stop without switching back. Only you can see them.
How do you tidy it before you send it?
Tidy a recording by cutting what nobody needs to watch and adding signposts, so people find the part they care about. After you press Stop, the recording opens in the editor. You can come back to it later from the ••• menu, under Edit recording.
- Trim the start and end. Drag the handles in from each end.
- Cut out the stumbles. Drag across the part on the timeline, then press Cut. Notes already left move with the edit.
- Move the camera bubble from any moment, so it never covers what you're showing.
- Add chapters. Press Chapter (or M) where each topic starts, and name it. Chapters split the timeline, so people can jump to the part they need.
- Write a description. It shows in the About tab beside the video, as text, a voice note or both. Use it as your brief: what this is and what you need back.
Then press Save and open project.
Here's a description you can copy and adapt:
This is a short walkthrough of how I've set up the project for the handover.
It's in three chapters: the files, the timeline, and what's left to do.
If anything's unclear, pause and leave a note at that moment, and I'll reply there.
How do you collect feedback on a recording?
Collect feedback by turning comments on and sharing the link. Recordings start with comments off, so you can watch yours back before anyone sees a note box.
- Turn comments on. Switch on Allow comments in the editor, or Comments in Project settings.
- Share the link however you normally would. Nobody needs an account: people type their name the first time they leave a note.
- People pause and leave a note at the exact moment. For a whole stretch, they can mark a range. Notes appear live, and you reply under each one.
- Use the transcript. SceneNote transcribes your voice automatically, so people can read along, search for a word, or select a few words and comment on them. The CC button shows it as captions.
Should comments be on or off?
Turn comments on when you want questions, feedback or a decision, and leave them off when you want people to just watch.
| What you're sending | Comments | Why |
|---|---|---|
| A handover or set-up walkthrough | On | Questions land on the exact moment they come up |
| A reply to a client's note | On | They can answer you right there |
| A pitch you want reactions to | On | They react to each idea as they see it |
| A finished training video for a whole team | Off | People watch and read the description, with no note box |
| A polished presentation | Off | Clean viewing, with nothing to debate |
How to share a video without inviting comments explains when to switch them off, and the other ways to stop new notes.
What does this look like on a real project?

When I want to walk a client through something I've drawn up in Milanote or Miro, I could share my screen on a call. But with clients in different parts of the world, lining everyone up for the same call is tough. So I record it: everything in one go, no interruptions, short and to the point, and they watch it when it suits them. It's better than an email because I can explain things visually, and better than a call because nobody has to be there at the same time.
I add chapters so people can skip to the parts that matter to them, or come back and rewatch a section without hunting for it. I move the camera bubble when it covers the text, and when I'm just talking, I swap the camera to full screen, so they're looking at me rather than a screen where nothing's happening.
Sometimes I turn comments off because I just want people to watch. Other times I leave them on, so questions land at the exact moment. By the time we do get on a call, most of them are already answered.
My tip for your first one: don't worry about slip-ups. Even 30 minutes in, if you fluff the last five, just keep going. You can cut that part out afterwards and nobody will know.
How to handle common problems
There's no computer sound
Safari records your voice but not the computer sound. If you need the sound from your editing app or a video, record in Chrome or Edge, and turn on the audio switch when you choose what to share. If you forget, the Check step shows computer sound as off, with a button to choose again.
Your Mac won't let the browser record the screen
The first time, your Mac asks you to allow it. Open System Settings, then Privacy & Security, then Screen & System Audio Recording, and switch on your browser. You may need to quit and reopen the browser.
The camera bubble covers something
Move it in the editor from that moment: to another corner, a smaller size, or swapped with the screen. Viewers can move it too, with the three camera buttons in the player.
It's running long
Long recordings rarely get watched to the end. Add chapters so people can skip to their part, cut what isn't needed, or record two shorter ones. The clock warns you before you reach the limit.
The upload fails
Your recording isn't lost. It stays in your browser, with Try again and Download a copy. You can upload a saved copy later from the recorder's Set up step (Upload a saved copy).
FAQ
Do I need to install anything to record my screen?
No. Recording works in your browser on a computer, with nothing to install.
Do people need an account to watch and comment?
No. They open the link and type their name the first time they leave a note.
How long can a recording be?
Up to 10 minutes on the free plan, and up to 60 minutes on Pro.
Does a recording count towards my projects?
Yes. A recording is an uploaded project, so on the free plan it counts towards your 2 uploaded projects at a time. Projects made from a link, such as YouTube or Google Drive, don't count.
Can people watch on their phone?
Yes, in any phone browser. On an iPhone or iPad they hear your voice, but not the computer sound.
Which browsers can record my screen?
Recording works in Chrome, Edge, Arc and Safari on a computer. All four record your screen, camera and voice. Chrome and Edge also record computer sound; Safari doesn't. Phones and tablets can't record, but people can watch on them.
Can I edit a recording after people have left notes?
Yes. Open Edit recording from the ••• menu. When you save, notes move to where their moments now sit.
What's the quickest way to get feedback on a screen recording?
Record in the browser, trim it, add chapters and a short description, then turn comments on and send one link. People leave notes at the exact moment, and you answer them there.
Record your screen. Explain it your way.
Walk someone through a demo, an idea or a project handover.
Related guides
Bryn North
Filmmaker and creative director · part of the team behind SceneNote
Bryn North is a filmmaker and creative director who has been making films since 2013, mostly documentaries and travel films, with a soft spot for stories about cultural heritage. He has directed, shot and edited launch films for DJI, worked with brands like Audi and Samsung and with a number of tourism boards, and some of his personal travel films have had millions of views. Working with a new client almost every month, he found that most of the job was communication, and that every client gave feedback differently. SceneNote is his answer: one simple way for clients to leave detailed notes and talk them through.
More guides by Bryn →